How to Clean and Maintain Your Coffee Grinder

Coffee lovers know that the quality of a brew is significantly influenced by the freshness of the beans and the consistency of the grind. A well-maintained coffee grinder is crucial for ensuring that your morning cup of coffee is as aromatic and flavorful as possible. However, many overlook the importance of regularly cleaning their coffee grinder, leading to old coffee grounds, oils, and residue that can affect the taste of your coffee and the longevity of your grinder. This article will guide you through the steps to properly clean and maintain your coffee grinder, ensuring it remains in top condition and provides consistent performance.
Why Cleaning Your Coffee Grinder Matters
Over time, coffee grinders can accumulate oils from the coffee beans, as well as fine particles that can clog the grinder's mechanisms. These residues can cause the grinder to work less efficiently and can impart stale or rancid flavors to your coffee. Regular cleaning not only helps preserve the freshness of your coffee but also extends the life of your grinder by preventing mechanical issues caused by buildup.

Tools and Materials You'll Need
A soft brush (a small paintbrush or a toothbrush works well)
A dry cloth
Compressed air (optional)
Grinder cleaning pellets (optional, for burr grinders)
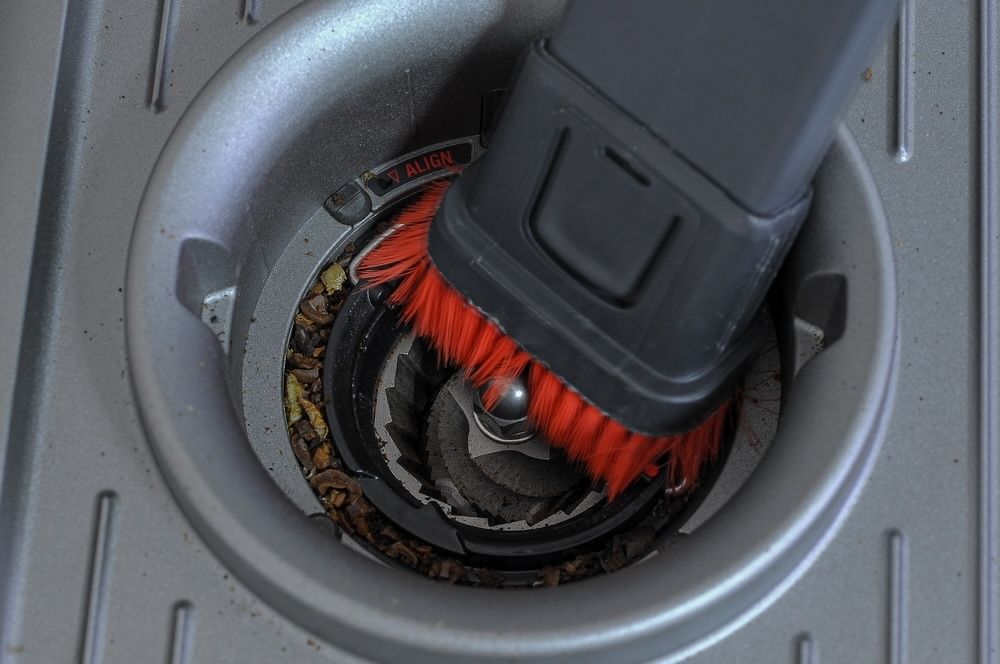
A vacuum cleaner with a narrow attachment (optional)
Step-by-Step Cleaning Guide
1. Unplug and Disassemble the Grinder
Safety first—always unplug your coffee grinder before cleaning. Disassemble the grinder according to the manufacturer's instructions. Typically, this involves removing the hopper, burrs (for burr grinders), and other removable parts.
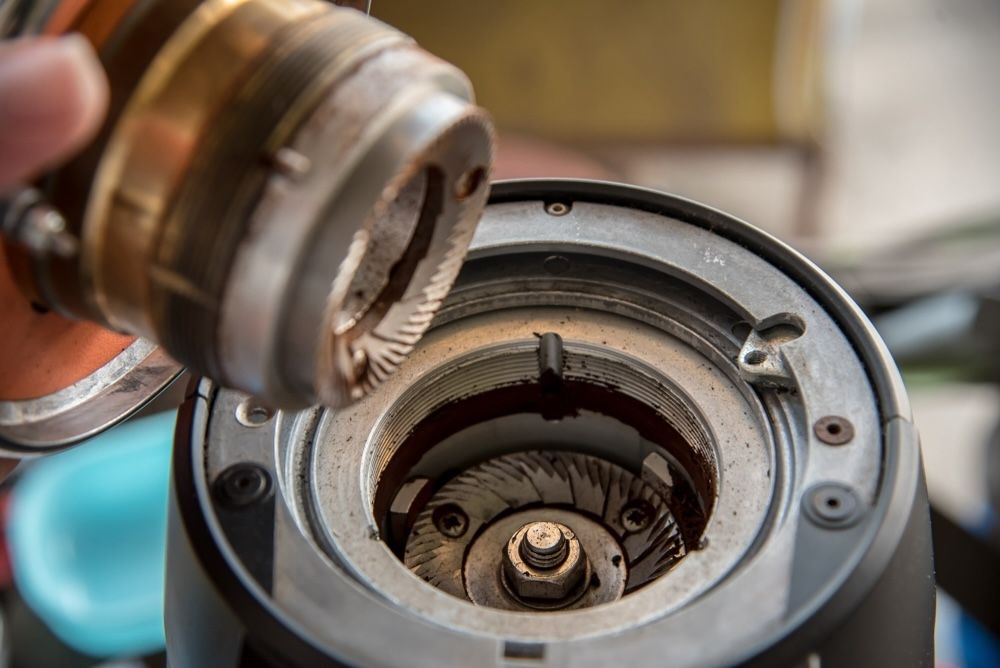
2. Brush Away Loose Grounds
Use a soft brush to gently remove any loose coffee grounds from the grinder's burrs, blades, and interior surfaces. Be thorough in reaching all the nooks and crannies where grounds might accumulate. If you're cleaning a blade grinder, be cautious around the sharp edges.
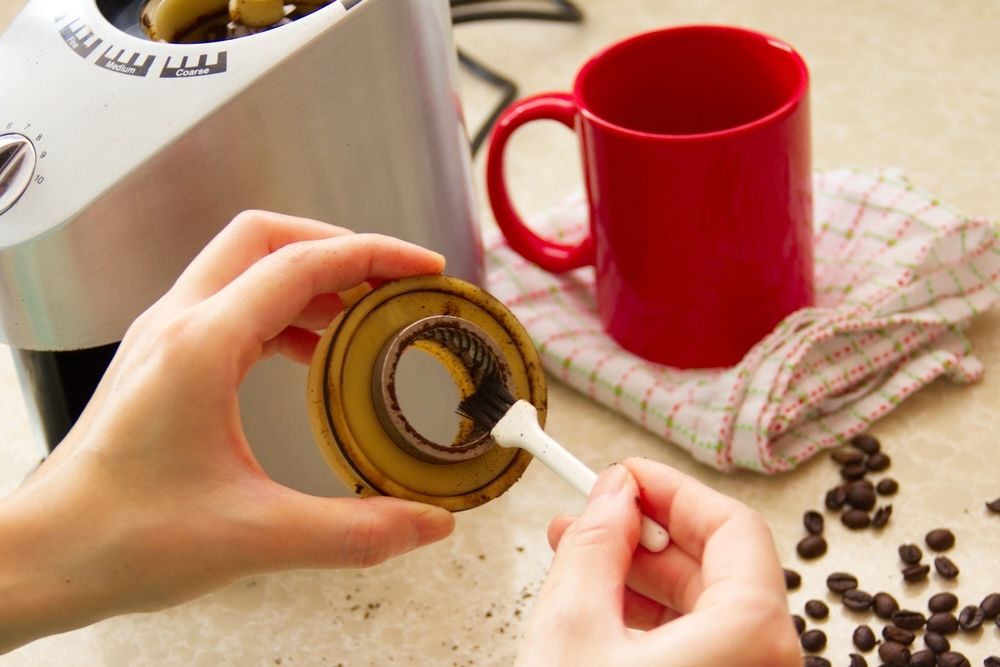
3. Clean the Hopper and Removable Parts
Wash the hopper and any other removable parts with warm, soapy water. Rinse thoroughly and allow them to dry completely before reassembling. For burr grinders, take extra care with the burrs—use only a dry brush or compressed air to clean them, as exposure to water can cause rusting.
4. Use Grinder Cleaning Pellets (Optional)
For burr grinders, consider using grinder cleaning pellets. These are specially designed to absorb oils and remove fine particles from the burrs. Follow the manufacturer's instructions for use—typically, you'll run the pellets through the grinder just as you would with coffee beans.
5. Wipe Down the Exterior
Use a dry cloth to wipe down the exterior of the grinder, removing any dust, fingerprints, or coffee grounds. Avoid using water or any cleaning agents on the exterior unless the manufacturer specifically recommends it.
6. Vacuum the Grinder (Optional)
If your grinder has areas that are difficult to reach with a brush, you can use a vacuum cleaner with a narrow attachment to remove any remaining debris. This is particularly useful for removing fine particles that may be trapped in tight spaces.
7. Reassemble and Test
Once all parts are clean and dry, reassemble your grinder. Plug it in and run a small amount of coffee through to ensure it's functioning properly and to remove any remaining cleaning residue.
Maintenance Tips for Prolonged Grinder Life
Regular Cleaning: Make it a habit to clean your grinder at least once a week if you use it daily. This prevents buildup and ensures consistent performance.
Deep Cleaning: Perform a deep cleaning, including the use of grinder cleaning pellets, once a month to remove oils and residues that regular cleaning might miss.
Check for Wear and Tear: Periodically check the burrs or blades for signs of wear. Dull burrs or blades can affect grind consistency and should be replaced as needed.
Endnotes
A clean coffee grinder is essential for brewing the best-tasting coffee and prolonging the life of your appliance. By following these simple cleaning and maintenance steps, you can ensure that your grinder remains in optimal condition, delivering fresh, flavorful coffee for years to come. Whether you're a casual coffee drinker or a dedicated connoisseur, taking care of your grinder is a small but impactful step in your coffee-making routine.
Topics
Check more articles on our blog
Super Effective Tips To Clean The Oven
How to Clean and Maintain Your Electric Kettle

Fridge Cleaning Comprehensive Guide for An Odorless and Sparkling Freezer
